Ingenious DIY ideas
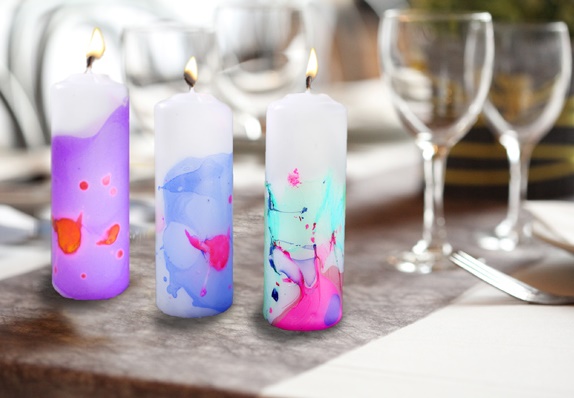
Nothing warms the atmosphere of a home like candles. If your travellers are spending the holidays in your rental, why not give them a special treat with custom decorated candles to create that oh-so-cosy atmosphere on a cold winter’s night. By using nail polish that’s reaching the end of its shelf life, you can quickly and easily customize plain candles on a small budget. Here are the 5 steps for this DIY project that allows you to give candles a marbled effect for the new year.
Required materials for DIY:
- Candles
- Nail polish
- A container
- A mixing stick
Steps for decorating candles:
- Pour water into a plastic or glass container; make sure the water is lukewarm to prevent the varnish from hardening too quickly.
- Shake the nail varnish bottle and place a few drops on the surface of the water. The varnish should float. If the varnish is too dry, add a little water and shake the bottle again. You can add as many colours of varnish as you want, but be careful not to waste too much time because the varnish dries quickly on the surface.
- Using a stick, such as a kebab skewer or toothpick, mix gently to obtain mottling or arabesques.
- Immerse the candle into the liquid and twist it in different ways according to the desired effect. Be aware, however, that it is preferable not to cover the whole candle with varnish if it is intended to be lit at the risk of releasing toxic odours. Decorate either a third or half of the surface. Then, remove the candle quickly; making a small rotation in case a film of dried varnish has formed on the surface.
- Place the candle on paper, aluminium, glass or plastic to allow it to dry for about a quarter of an hour. If the candle still has a few droplets of water, wipe them gently with a dry cloth or absorbent paper.
And that’s it; you now have an artistic creation worthy of the best!

