Ingenious DIY ideas
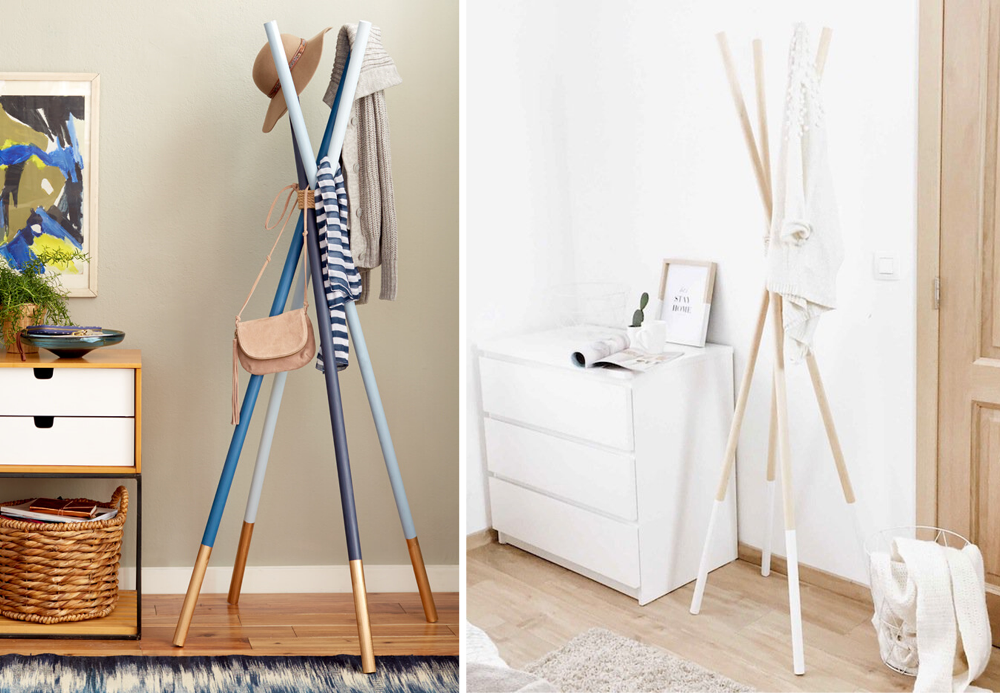
It tends to be neglected, yet the coat rack is a key element to creating a welcoming entrance. Since there’s only one chance to make a good first impression, make sure your rental has a functional but stylish coat rack. Why not make it yourself? If you’re good at DIY and decoration, play Mikado! By connecting a handful of wooden sticks together you can make your very own custom design coat rack. Here are the steps for this quick, easy and moreover low-budget DIY project…
 Emily Henderson / I do it myself
Making a DIY "Mikado" coat rack
Step 1: Cutting
Buy a selection of long wooden rods, about 3 cm in diameter, and saw them into 4 pieces (or have them cut for you in DIY store) of equal lengths, for example 170 cm. Sand down the tips that were cut with sandpaper to avoid splinters.
Step 2: Painting
In fact, it is always advisable to sand before painting to allow the paint to better adhere to the surface, so lightly sand the entire rod with fine sandpaper. Make sure you wipe it down for dust afterwards. Now use masking tape to delineate the parts that will be hand painted or sprayed with metallic paint. Apply two coats while making sure to respect the recommended drying time between coats. To make drying them easier place the painted sticks in a tall vase or box to keep them upright while they dry.
Step 3: The assembly
Gather the 4 sticks together to form a square (two rods below, two above). At about 50 cm from the top, wrap a 4 cm diameter rope around the ensemble at least 5 times. Finish with a knot that can be hidden between the ropes.
All that’s left to do now is unfold the coat rack in the perfect place. It can reign in the entrance hallway, but will just as easily find its place in the bedroom or bathroom.vThe advantage of this DIY project is that you can adapt the coat rack to any interior style by customizing with the colours and pattern of your choice.

