Ingenious DIY ideas
Christmas trees are a must, especially if you welcome tourists during the holiday season. It warms up your home’s atmosphere as well as the hearts of travellers and as such should not be bypassed. Saying that, we all know that a real tree just isn’t practical in a rental home. They require maintenance, leave needles scattered around the floor and take up a lot of volume in an often restricted living space. A solution? A Christmas tree that you make yourself using fairy lights. An easy low budget DIY project that is sure to shine bright! Here’s how to do it…
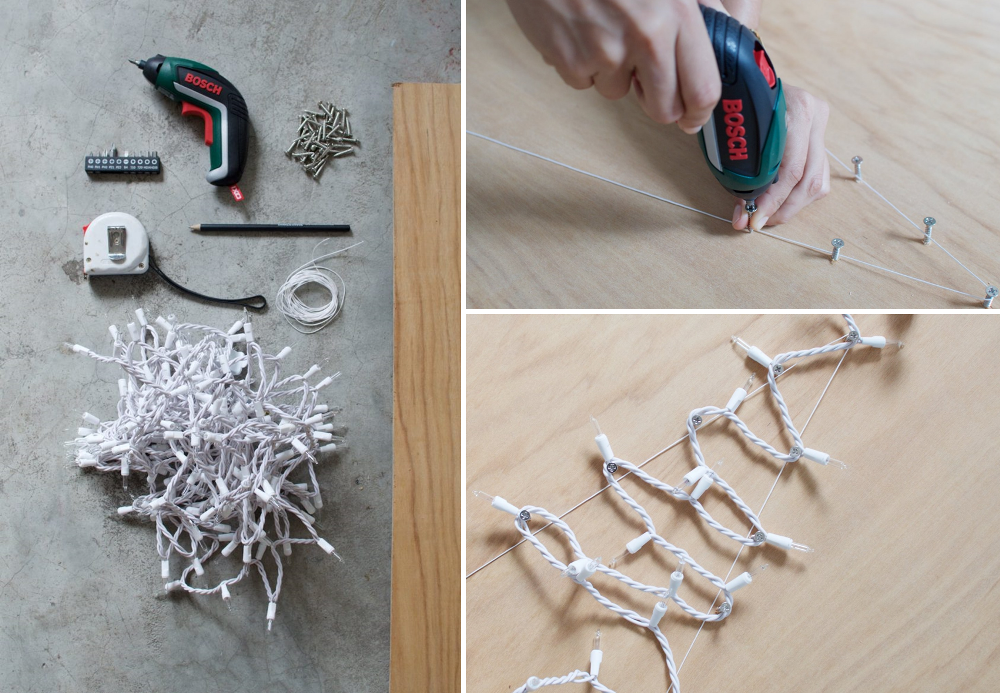
1. The length of the electric garland will determine the height of the tree and therefore the size of the wooden panel that will serve as a support. For a string of lights measuring 5 metres for example, choose a pine panel that is 2 meters high and 1 meter wide.
2. Insert a screw (or nail) about 2.5 cm long on the board, making sure it is well centred. This will be the starting point of the tree being positioned at its top. Add two other screws into the bottom of the panel to create an isosceles triangle.
3. Place a wire around these three screws so as to delimit the outline of the tree. Now, place screws every 10 centimetres along the wire. An electric screwdriver will make things easier. Then remove the wire.
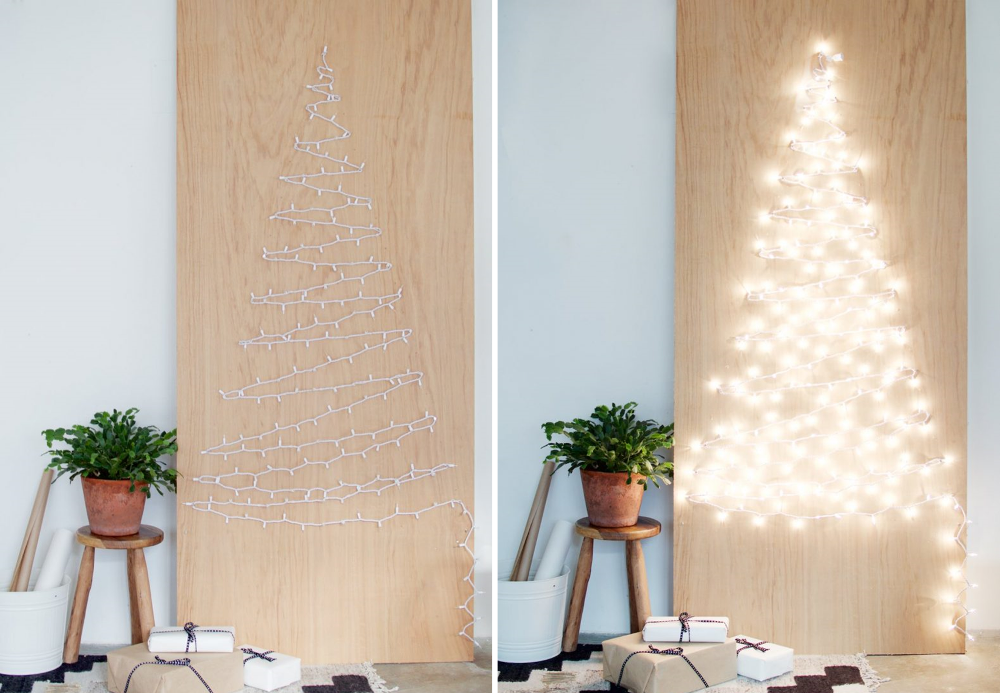
4. It is now a question of wrapping the string of fairy lights around the screws forming a zig zag. Then plug it in. That’s all there is to it, you know have a 2D Christmas tree twinkling with light!
And for other original ideas for home-made trees, discover DIY models without needles.


