Ingenious DIY ideas
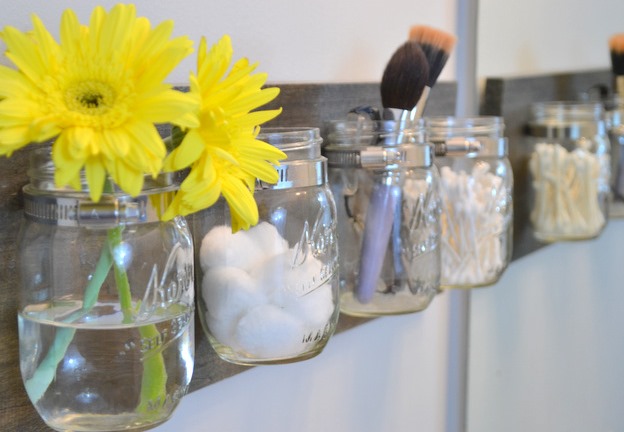
If your rental’s bathroom has minimal storage and not enough space to install a piece of furniture, don’t give up. You can create fun and functional storage using different DIY tricks. One of these is making a clever wall mount using mason jars. Your guests can use it to store various accessories such as toothbrushes, a hair brush, creams, cotton buds, and so on which will make them feel that much more at home. Here is a relatively easy to make and low budget tutorial which will elegantly accessorize your bathroom.
Supplies:
- A wooden board
- Jars, pots, or Mason jars
- Hose clamps
- Wood screws
- Screws (or pegs) for wall mounting
Step 1: Prepare the support structure
Cut a board down to the perfect size for your bathroom (or have it cut for you). For example a 50 x 25 cm board would be perfect for four pots. You can either keep the wood raw or paint it to fit in with the decor. If you paint it, use sandpaper to lightly sand the surface, remove any excess dust and apply two coats of specialized wood paint. Be sure to allow enough drying time.
Step 2: Pre-drilling
Draw a horizontal line in pencil on the board and determine, at regular intervals, the points where you’ll attach the jars. The space between each hook will depend on the volume of each selected pot. Pre-screw your screws half way using a Phillips screwdriver (make sure screws are suitable for wood and shorter than the thickness of the board) then remove them. You can also make these pre-holes by using a drill and appropriate drill bit. Once done, erase the guiding line.
Step 3: Attach the hose clamps
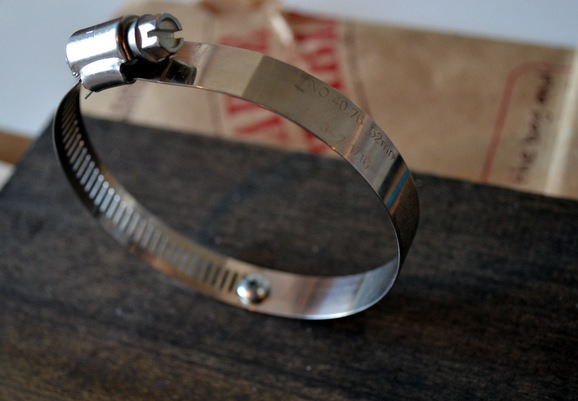
Clamps will help keep the pots stable, so it’s important to choose ones that are adapted to the volume of the pots/jars you’re hanging. If you can’t find the right size, don’t worry, you can buy clamping ribbon instead. You can then cut it at the appropriate length using metal cutters. You'll find all these materials in the DIY section. Using a Phillips screwdriver, attach the hose clamp to the board (the screw must be placed at the three quarter marker on the clamp). If the screw has difficulty going in feel free to use the drill to slightly enlarge the hole.
Step 4: Hanging the jar
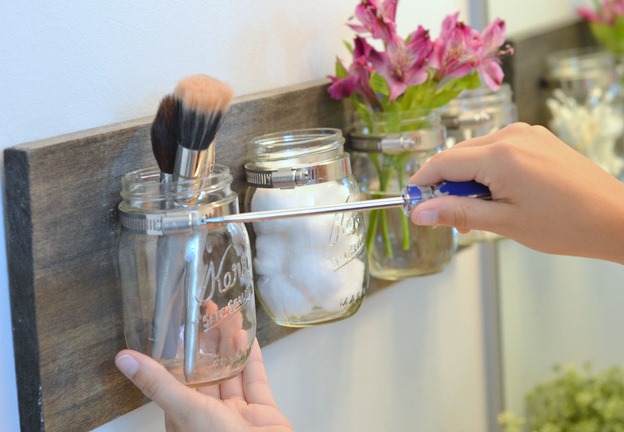
Once all the hose clamps are attached to your support board, it’s time to hang the pots or jars. To do this, use your Phillips screwdriver to tighten the clamp by turning counter-clockwise until it’s completely closed and the pot is firmly supported. All that’s left to do now is fix the board to your wall using the appropriate screws for your wall type.
You now have additional and customized storage for your bathroom. You can also use this DIY technique for storing cooking utensils in the kitchen, plant a few aromatic herbs or sort out office materials. As for cleaning, it’s easy! Just slightly loosen the hose clamps enough to remove the jar and then simply wash it. Additionally there’s nothing to prevent you from closing the container with a lid.


 ©
©